Release Application In Internal Testing
Internal test release
- To enable In-App product creation, uploading at least one APK file of the application is required.
- Additionally, to test In-App purchases before release, the app can be published in internal testing by adding tester emails.
Step 1 : Generate android aab for release
- Follow official Build and release an Android app guide to setup Flutter application for android aab.
Step 2 : Set up email for license testing
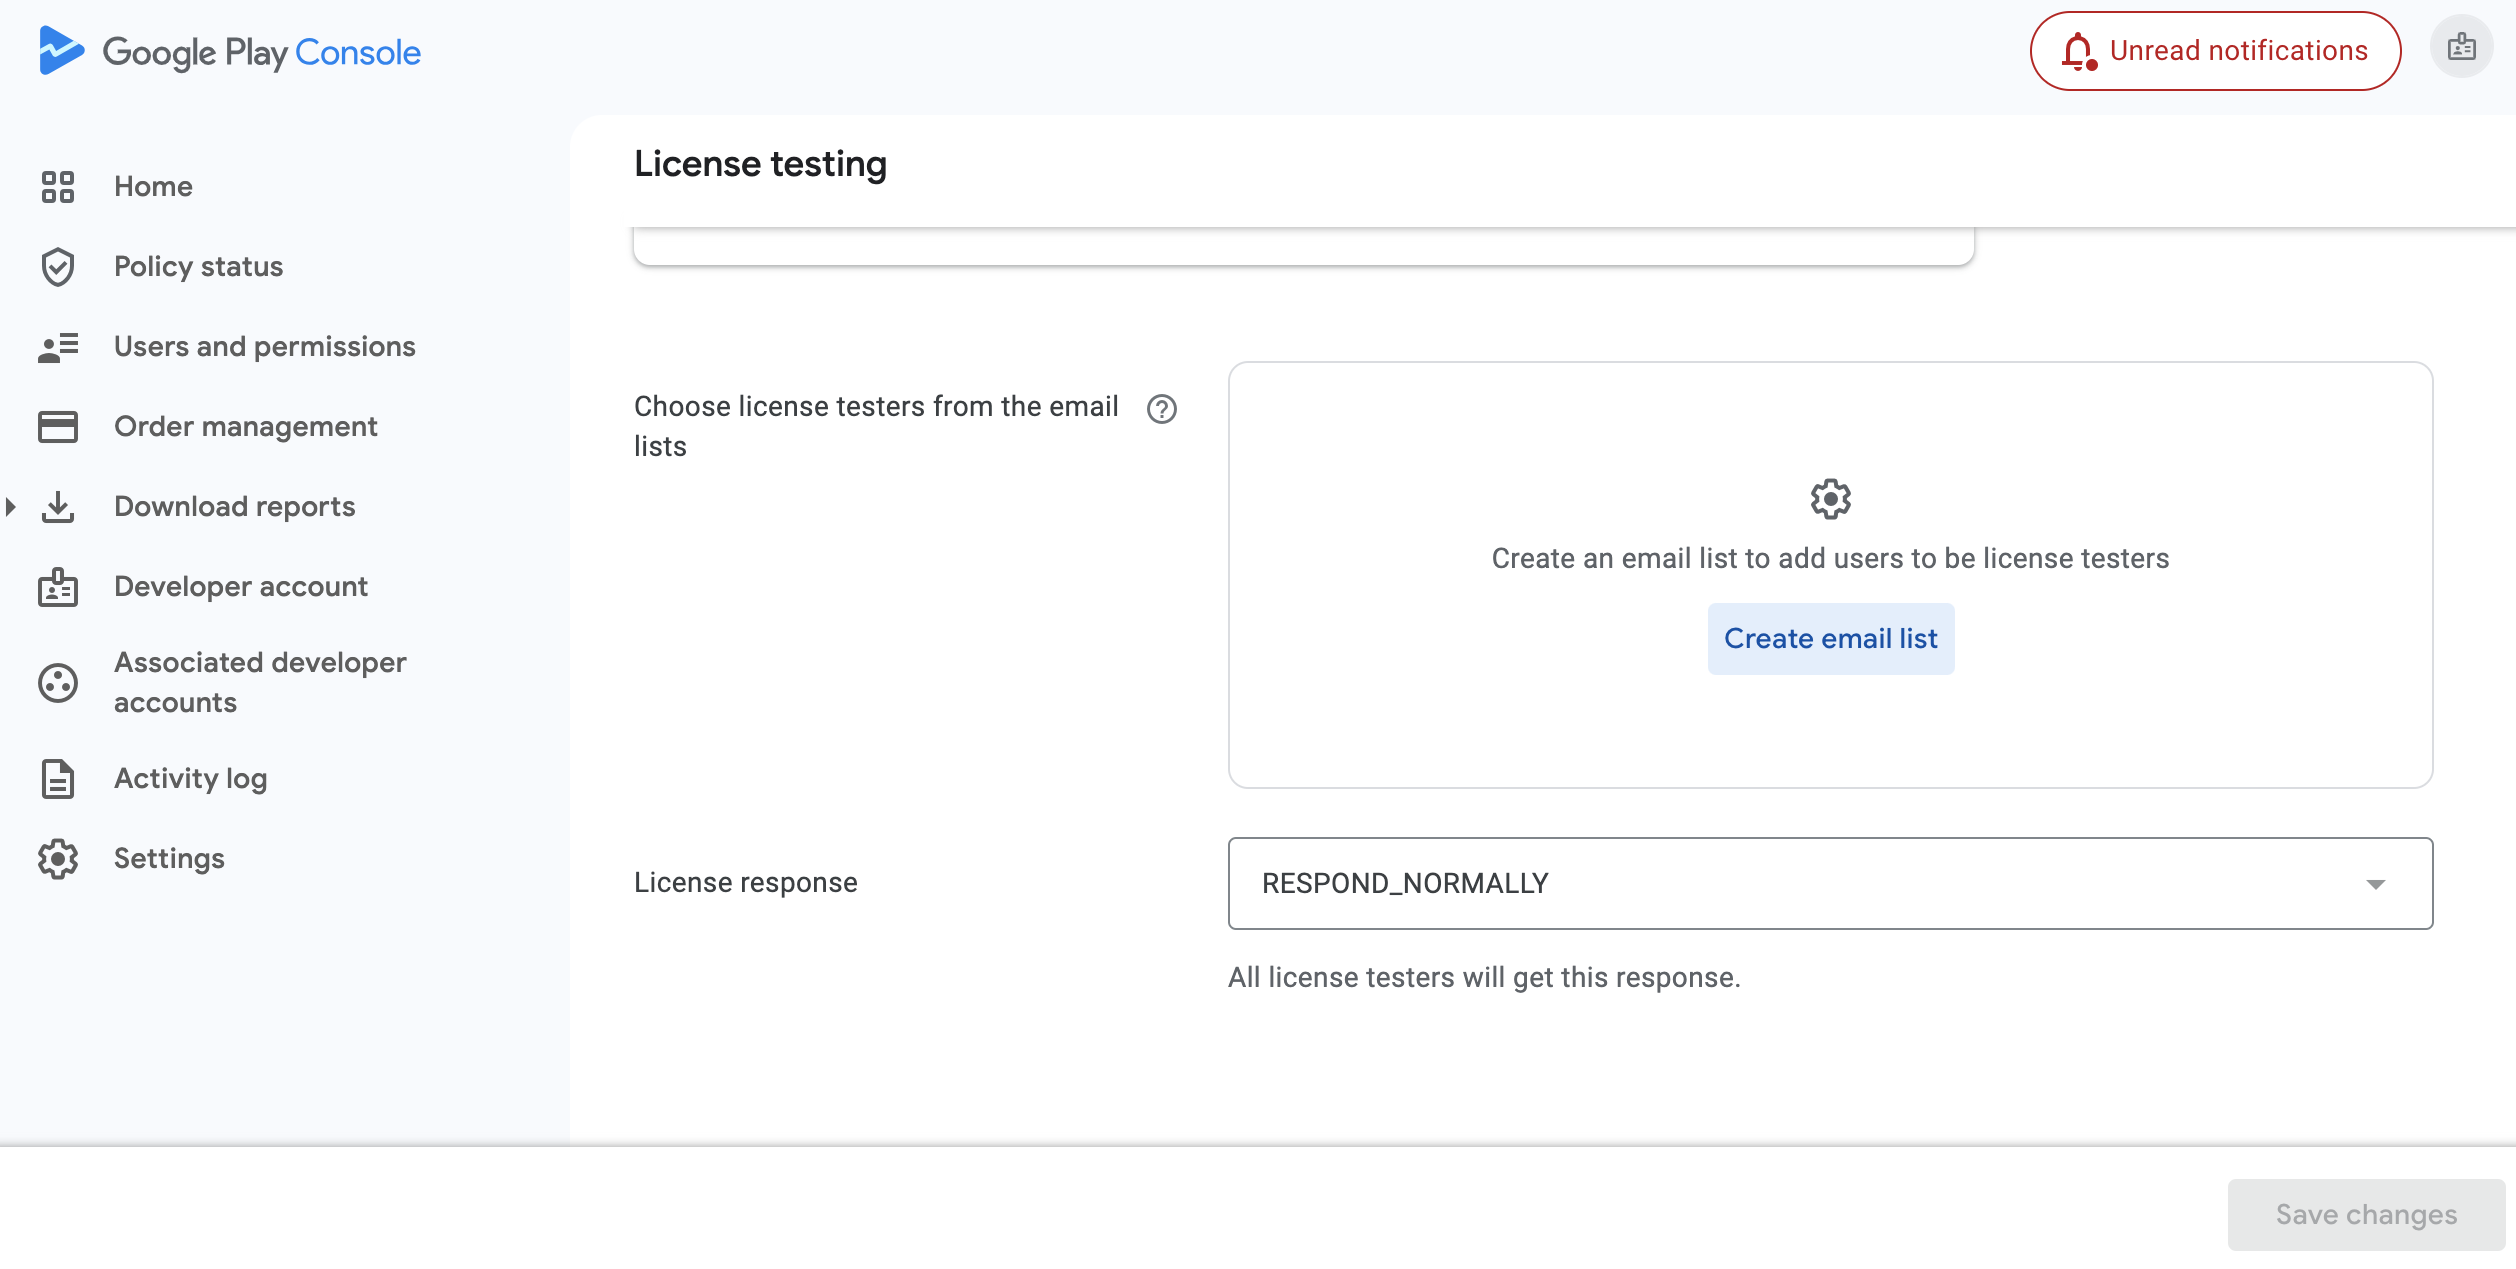
- To test licensing and in-app billing integrations we need to add email of license testers.
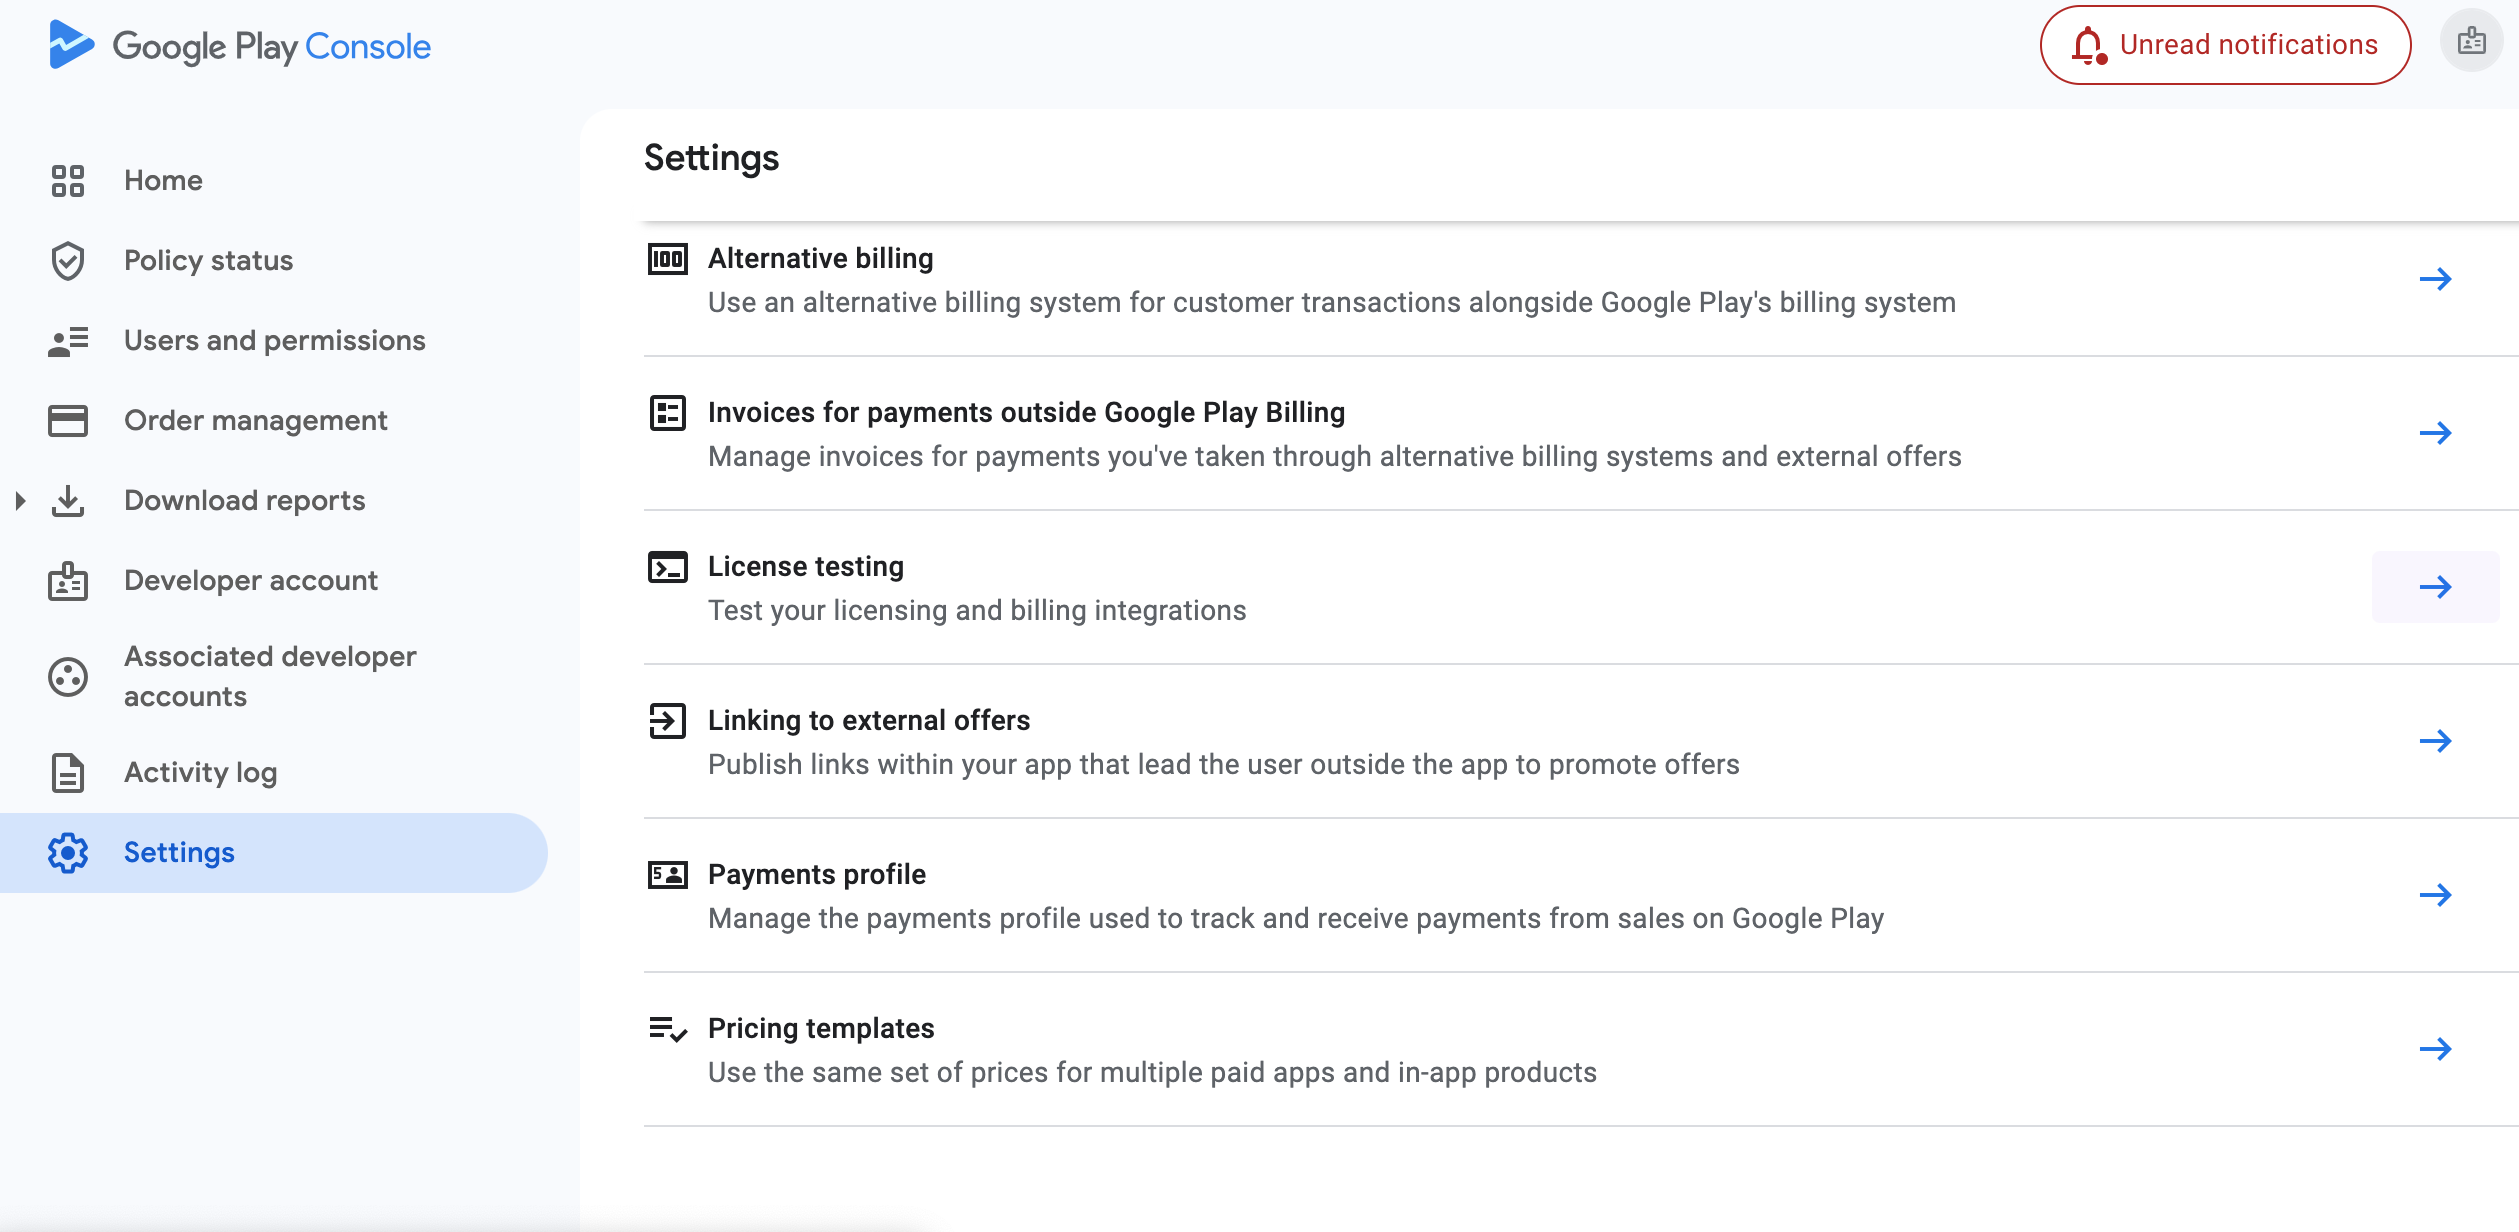
- For this go to Google Play Console > Settings > License testing.
- Tap on Create email list.
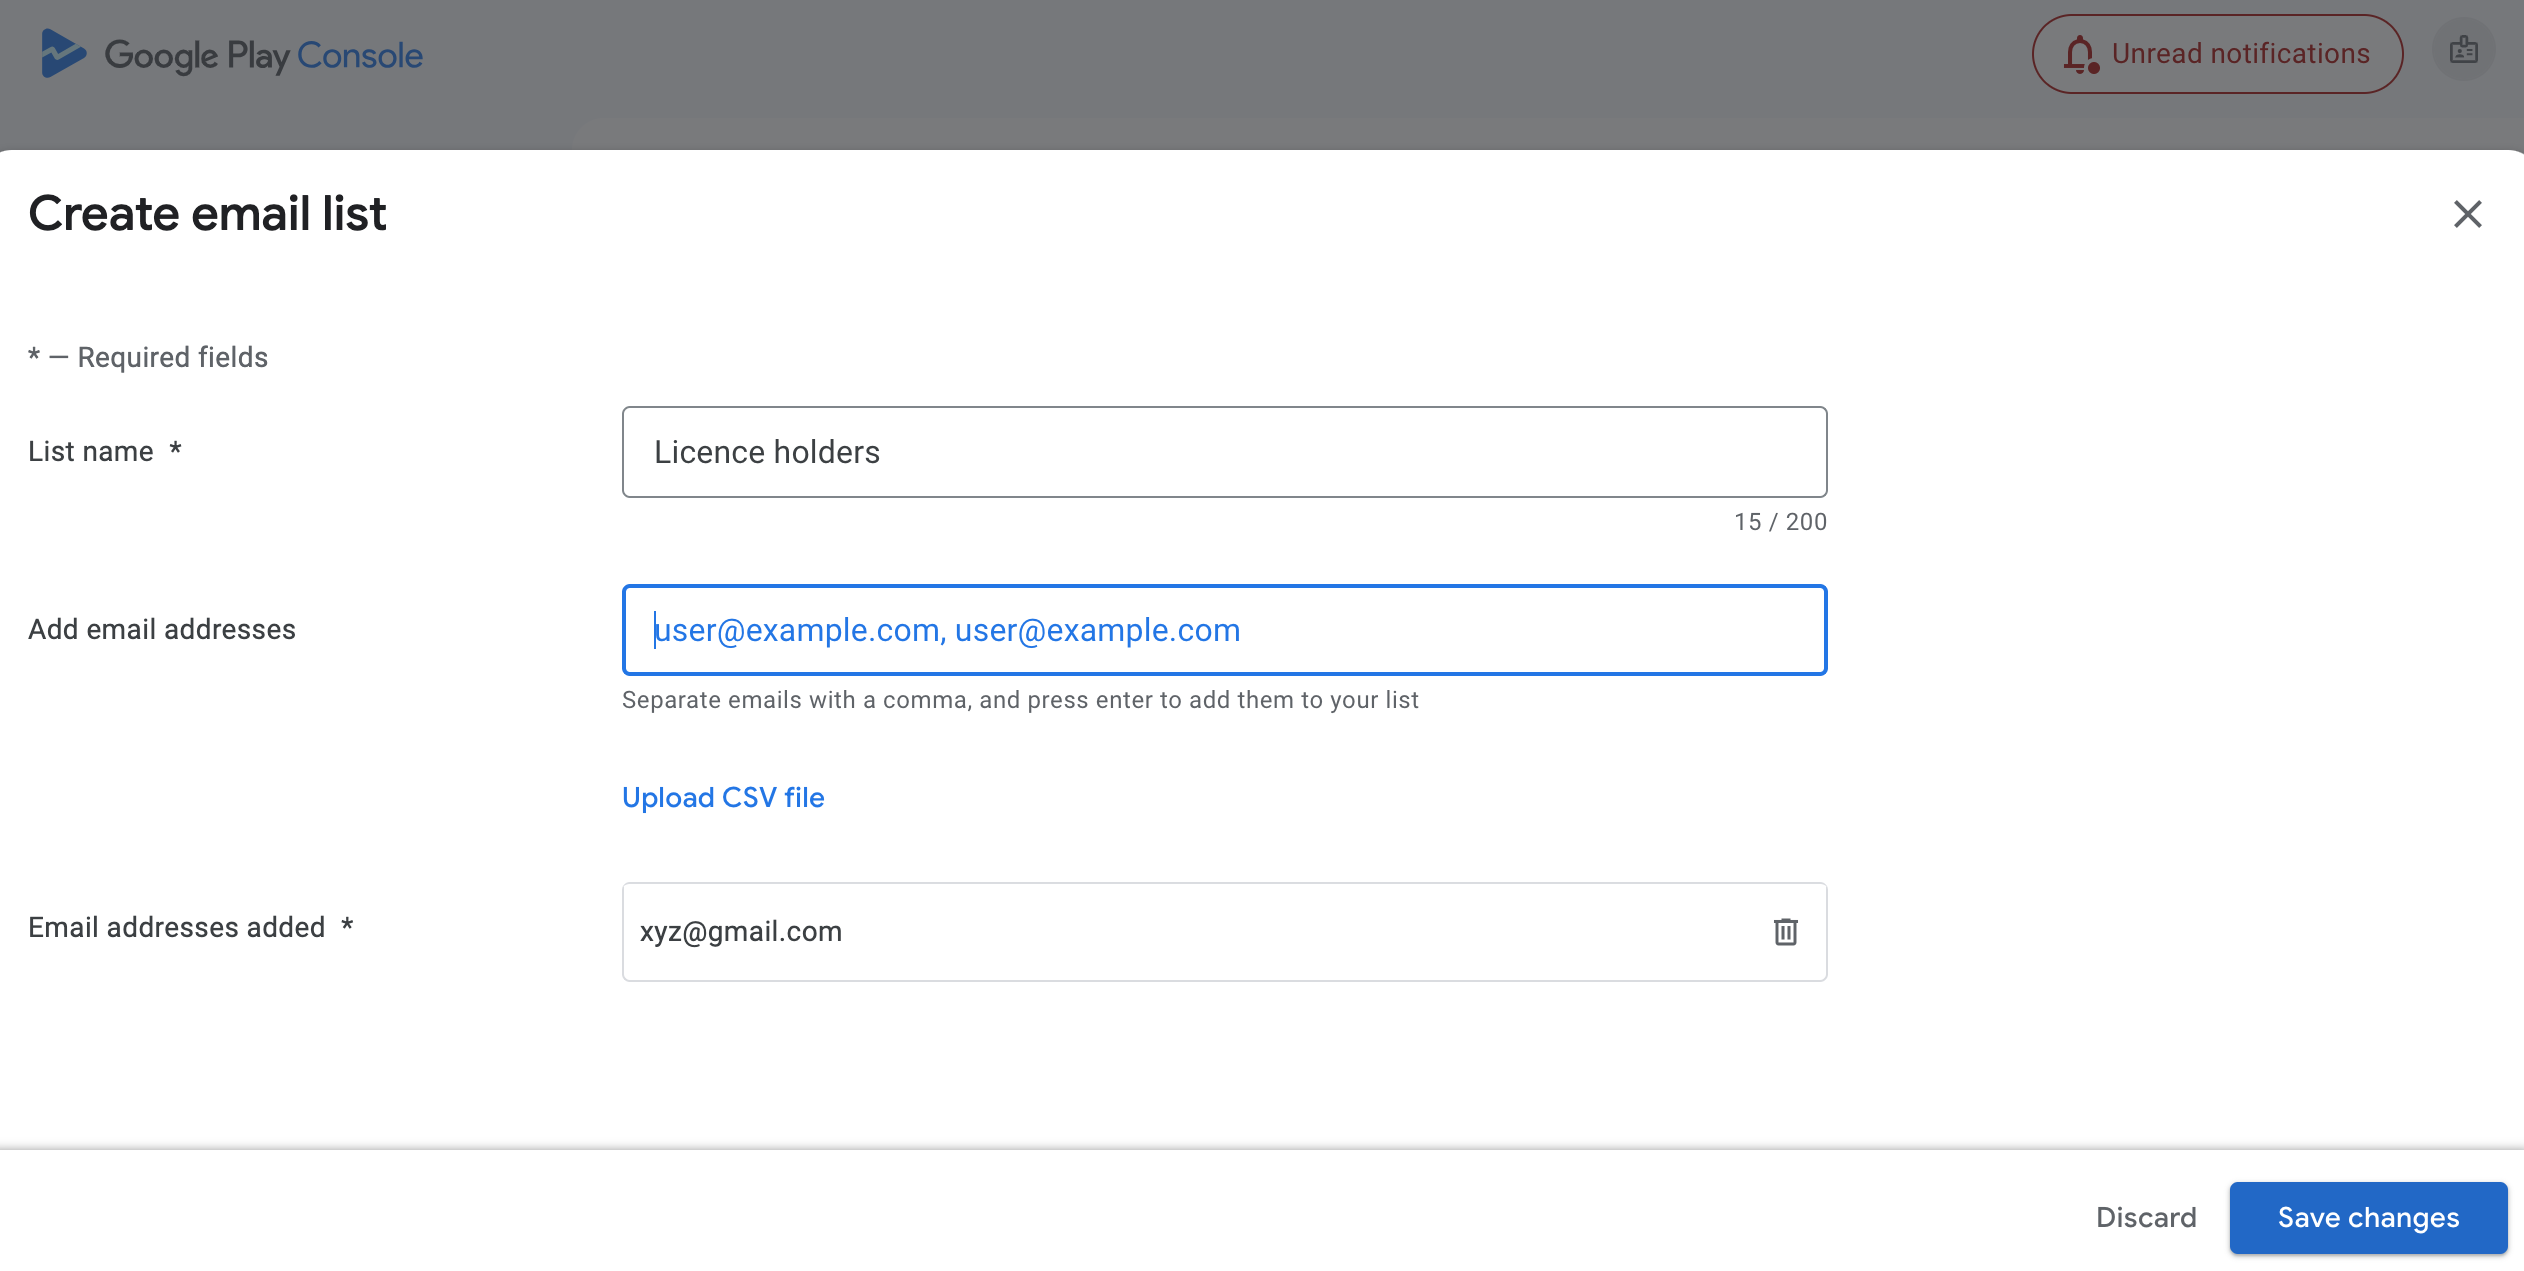
- Enter name of list. Add email of account to be license tester and hit entre to unable Save changes button.Once you are done save the changes.
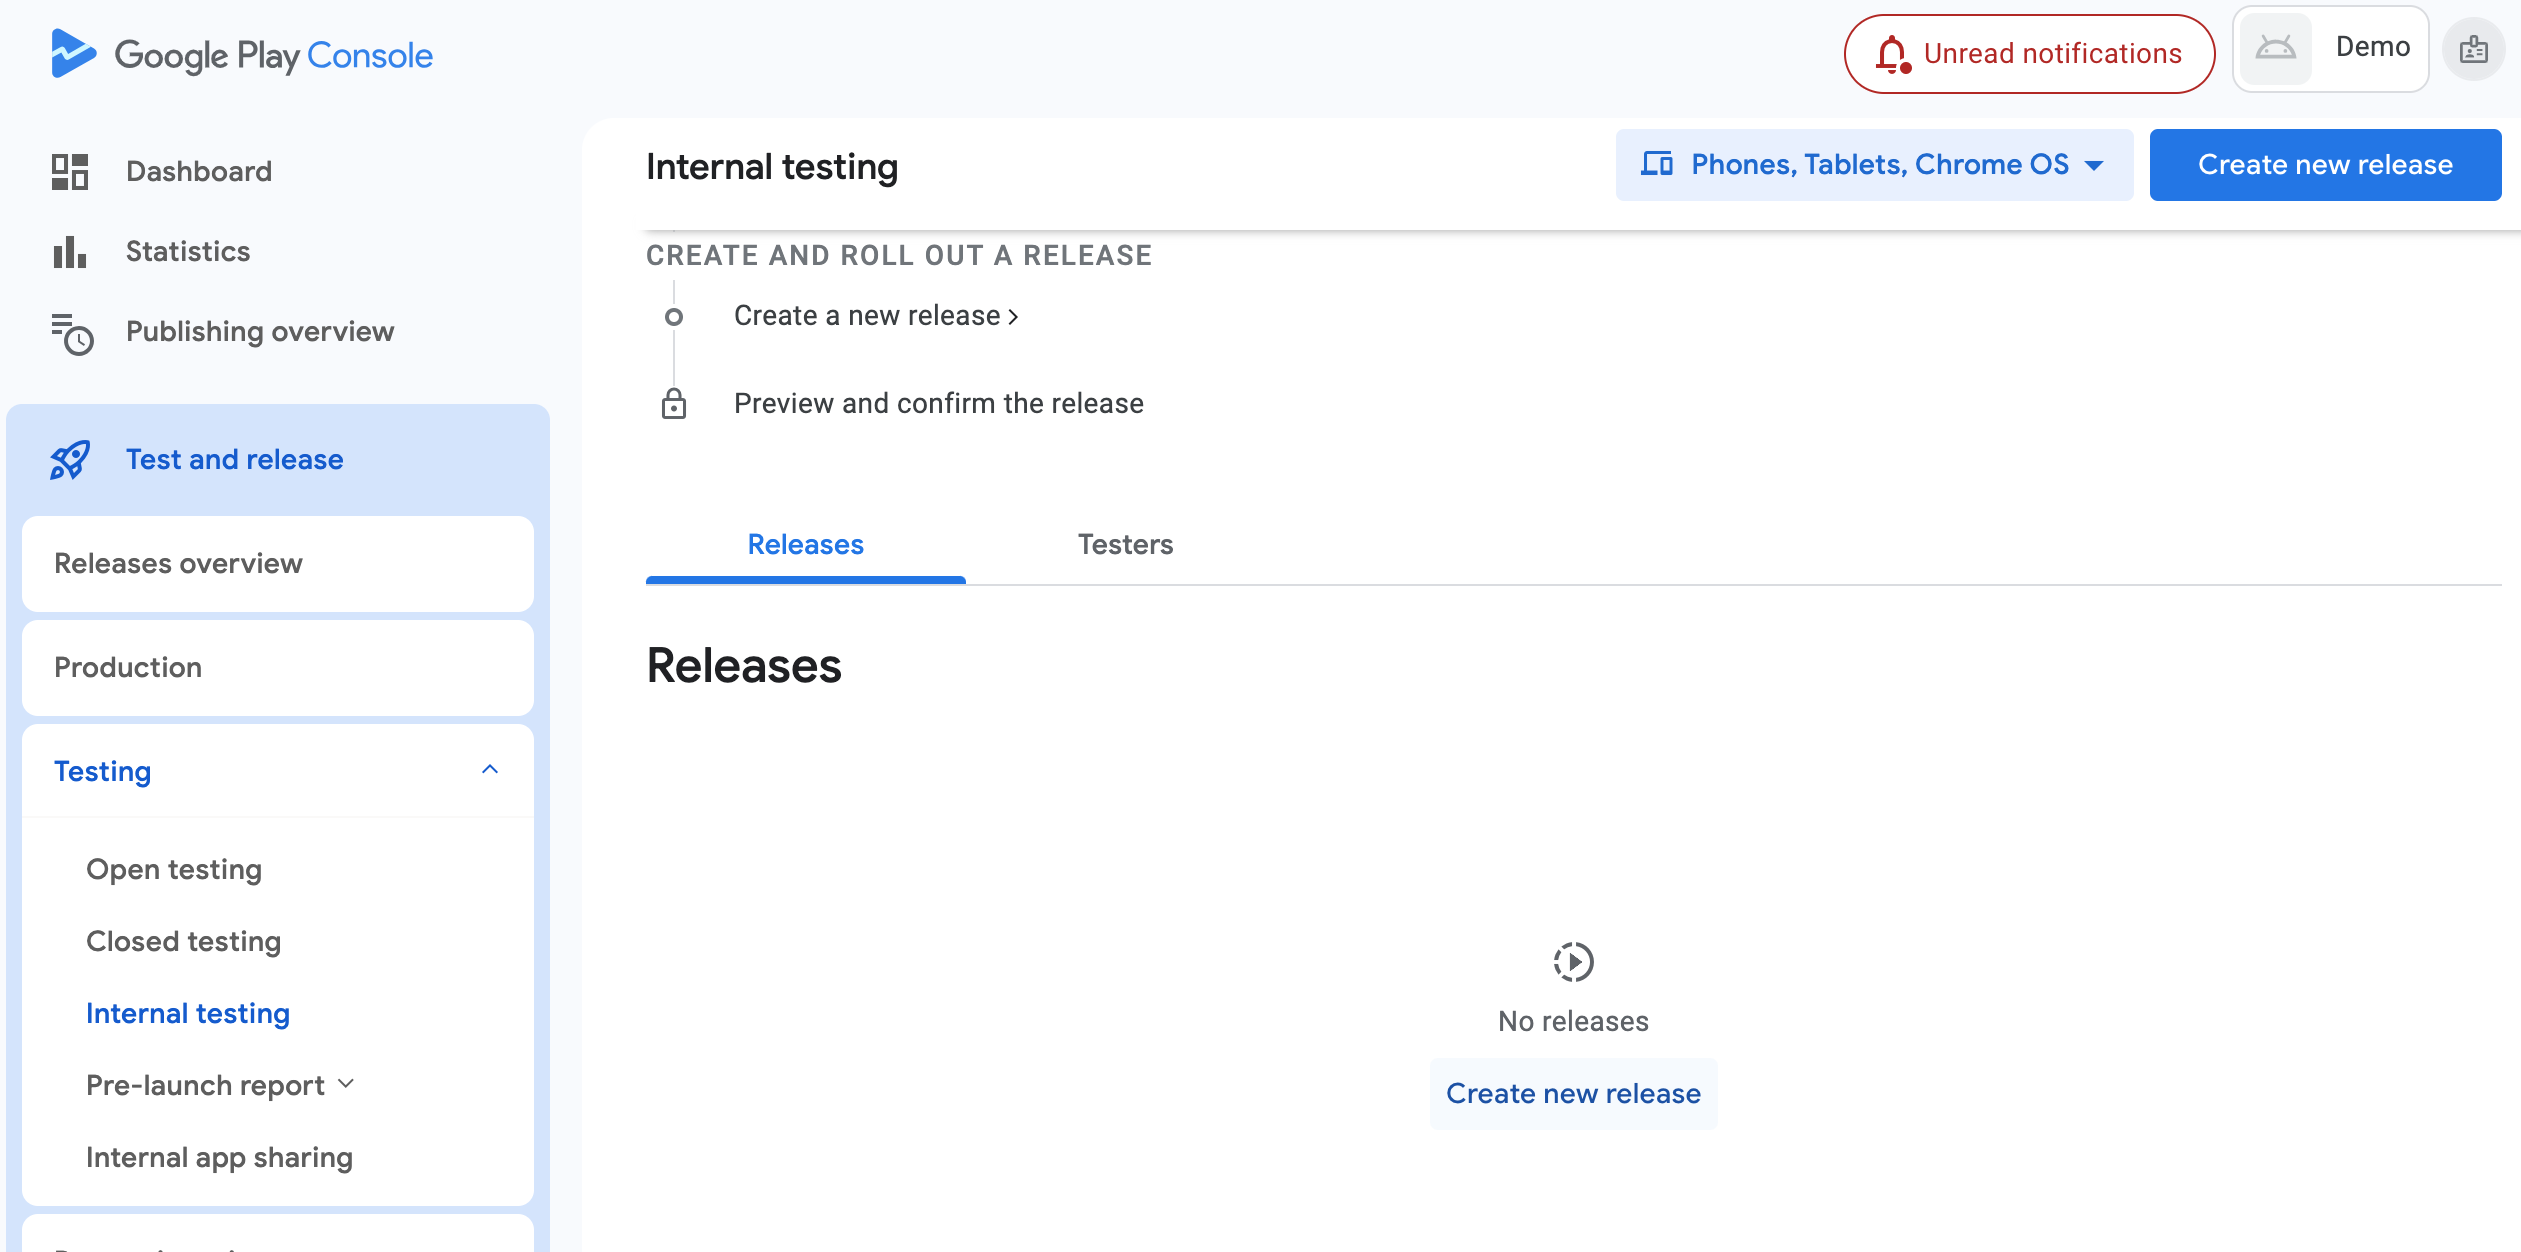
Step 3 : Release application in internal testing by internal test track
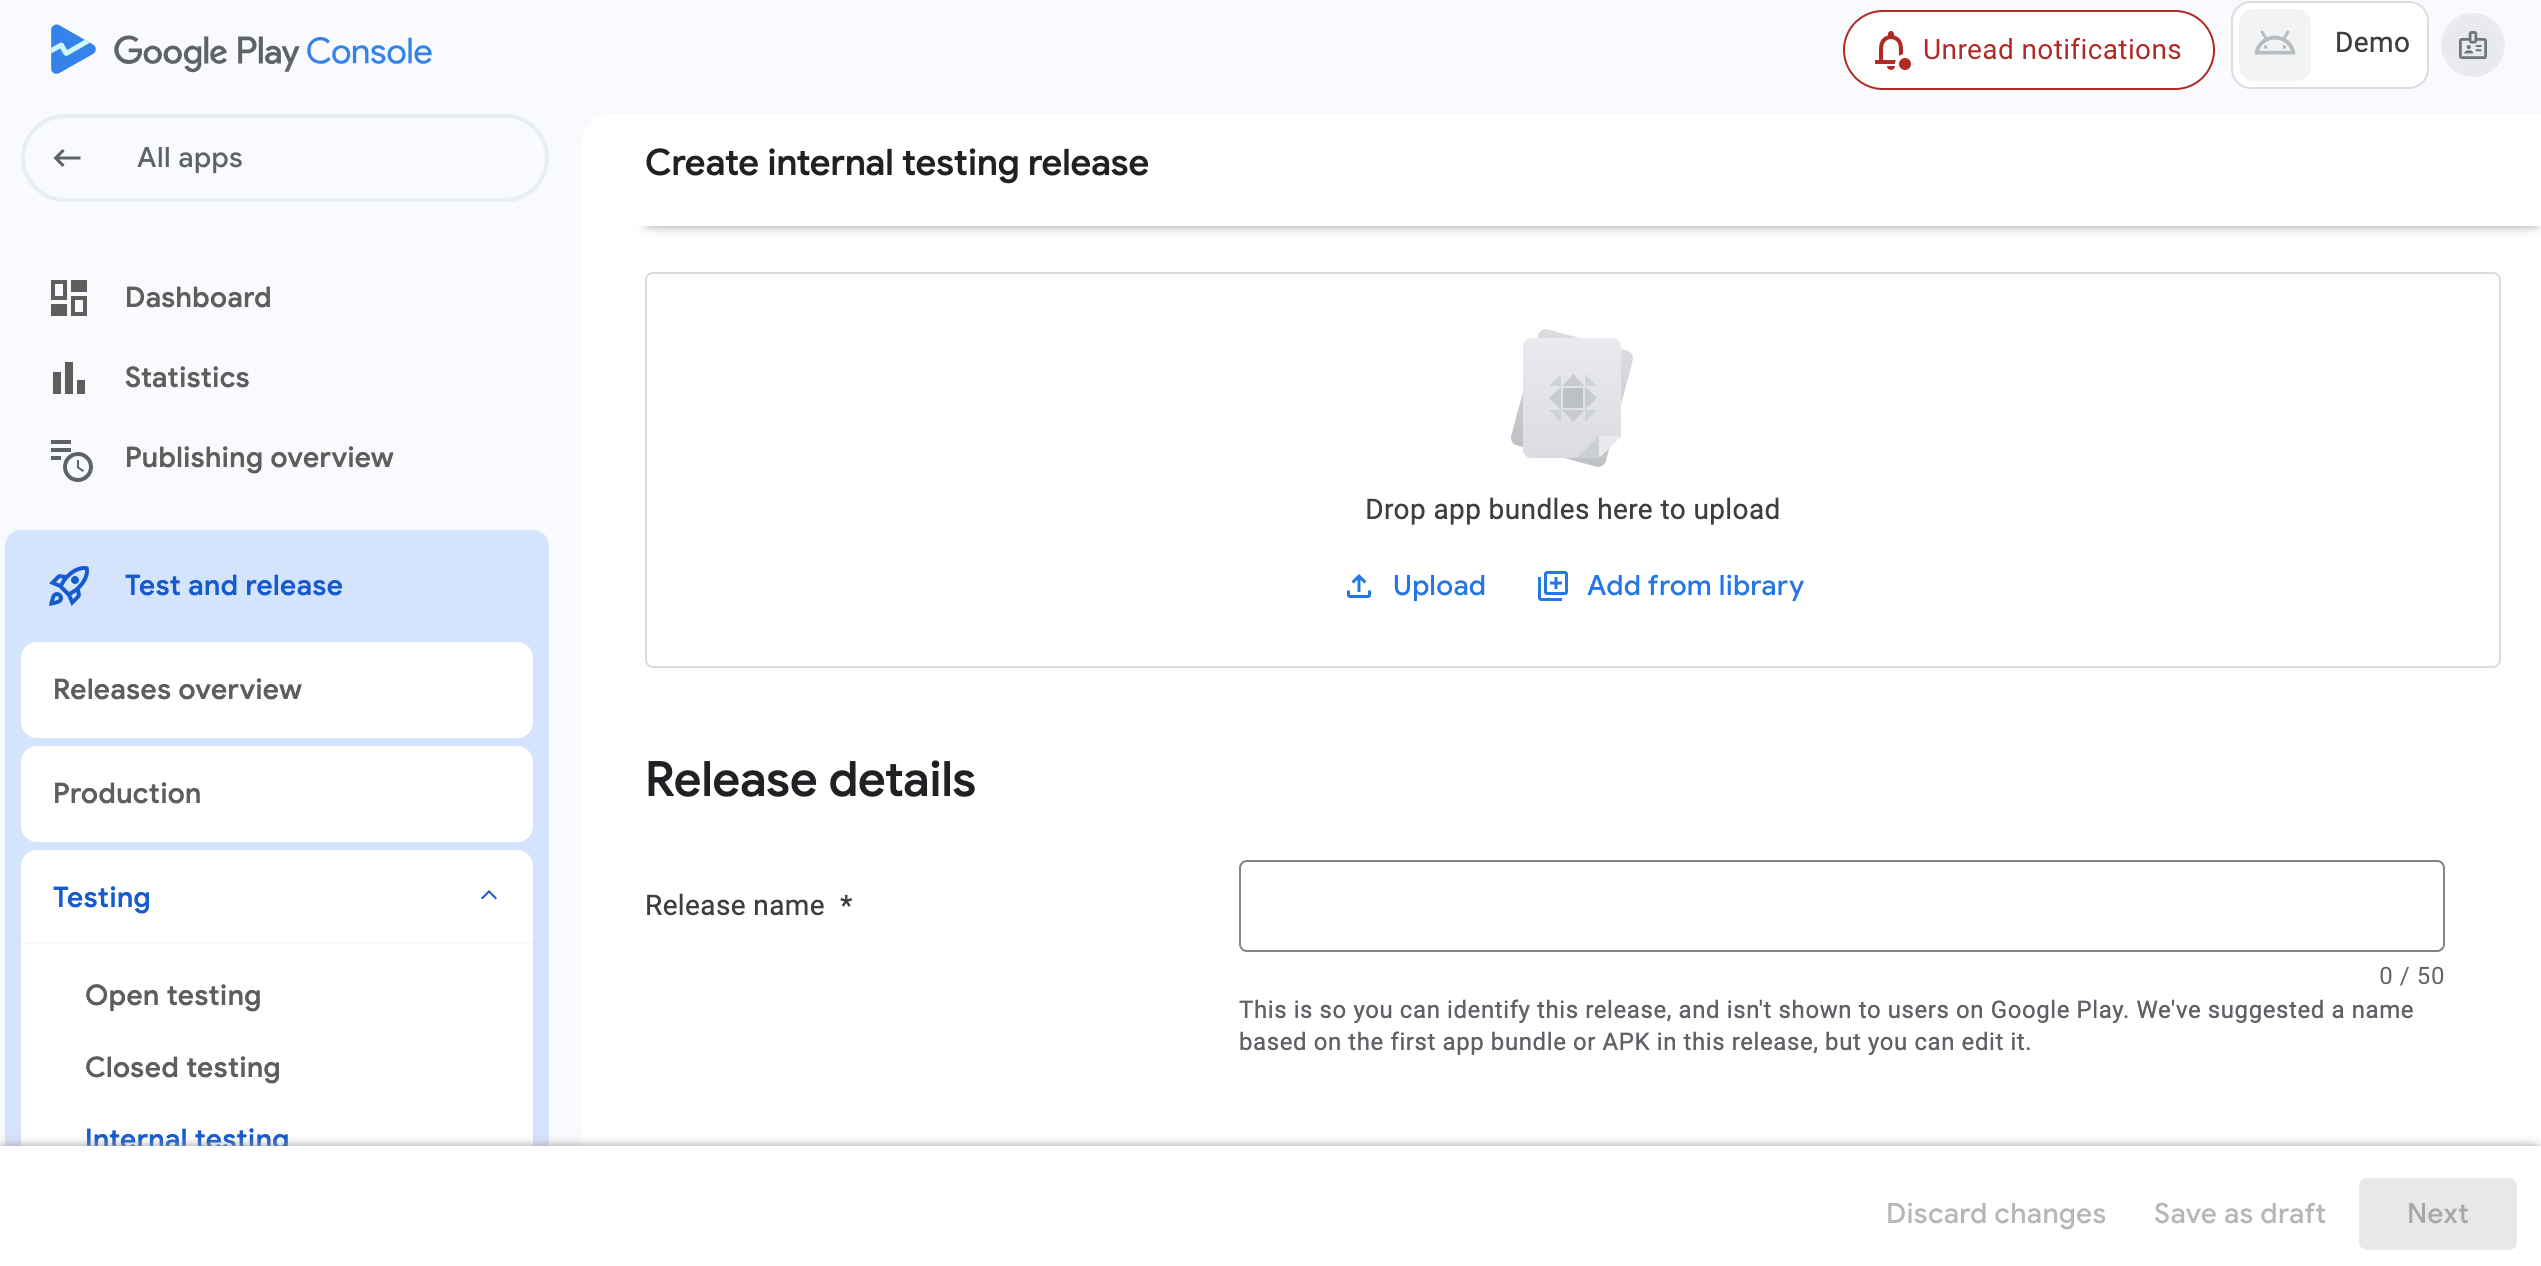
- In console go to Test and release > Testing > Internal testing and tap on Create new release.
- Here upload app bundle and provide Release name and Release notes.
- Hit Next.
Precaution
- In case you are creating products in Google Play before adding code implementation for In-App purchase in Flutter application, make sure you have at-least added the package in_app_purchase.
- This will make sure that APK file has a necessary requirement of having right Billing permission to proceed creating in-app products.
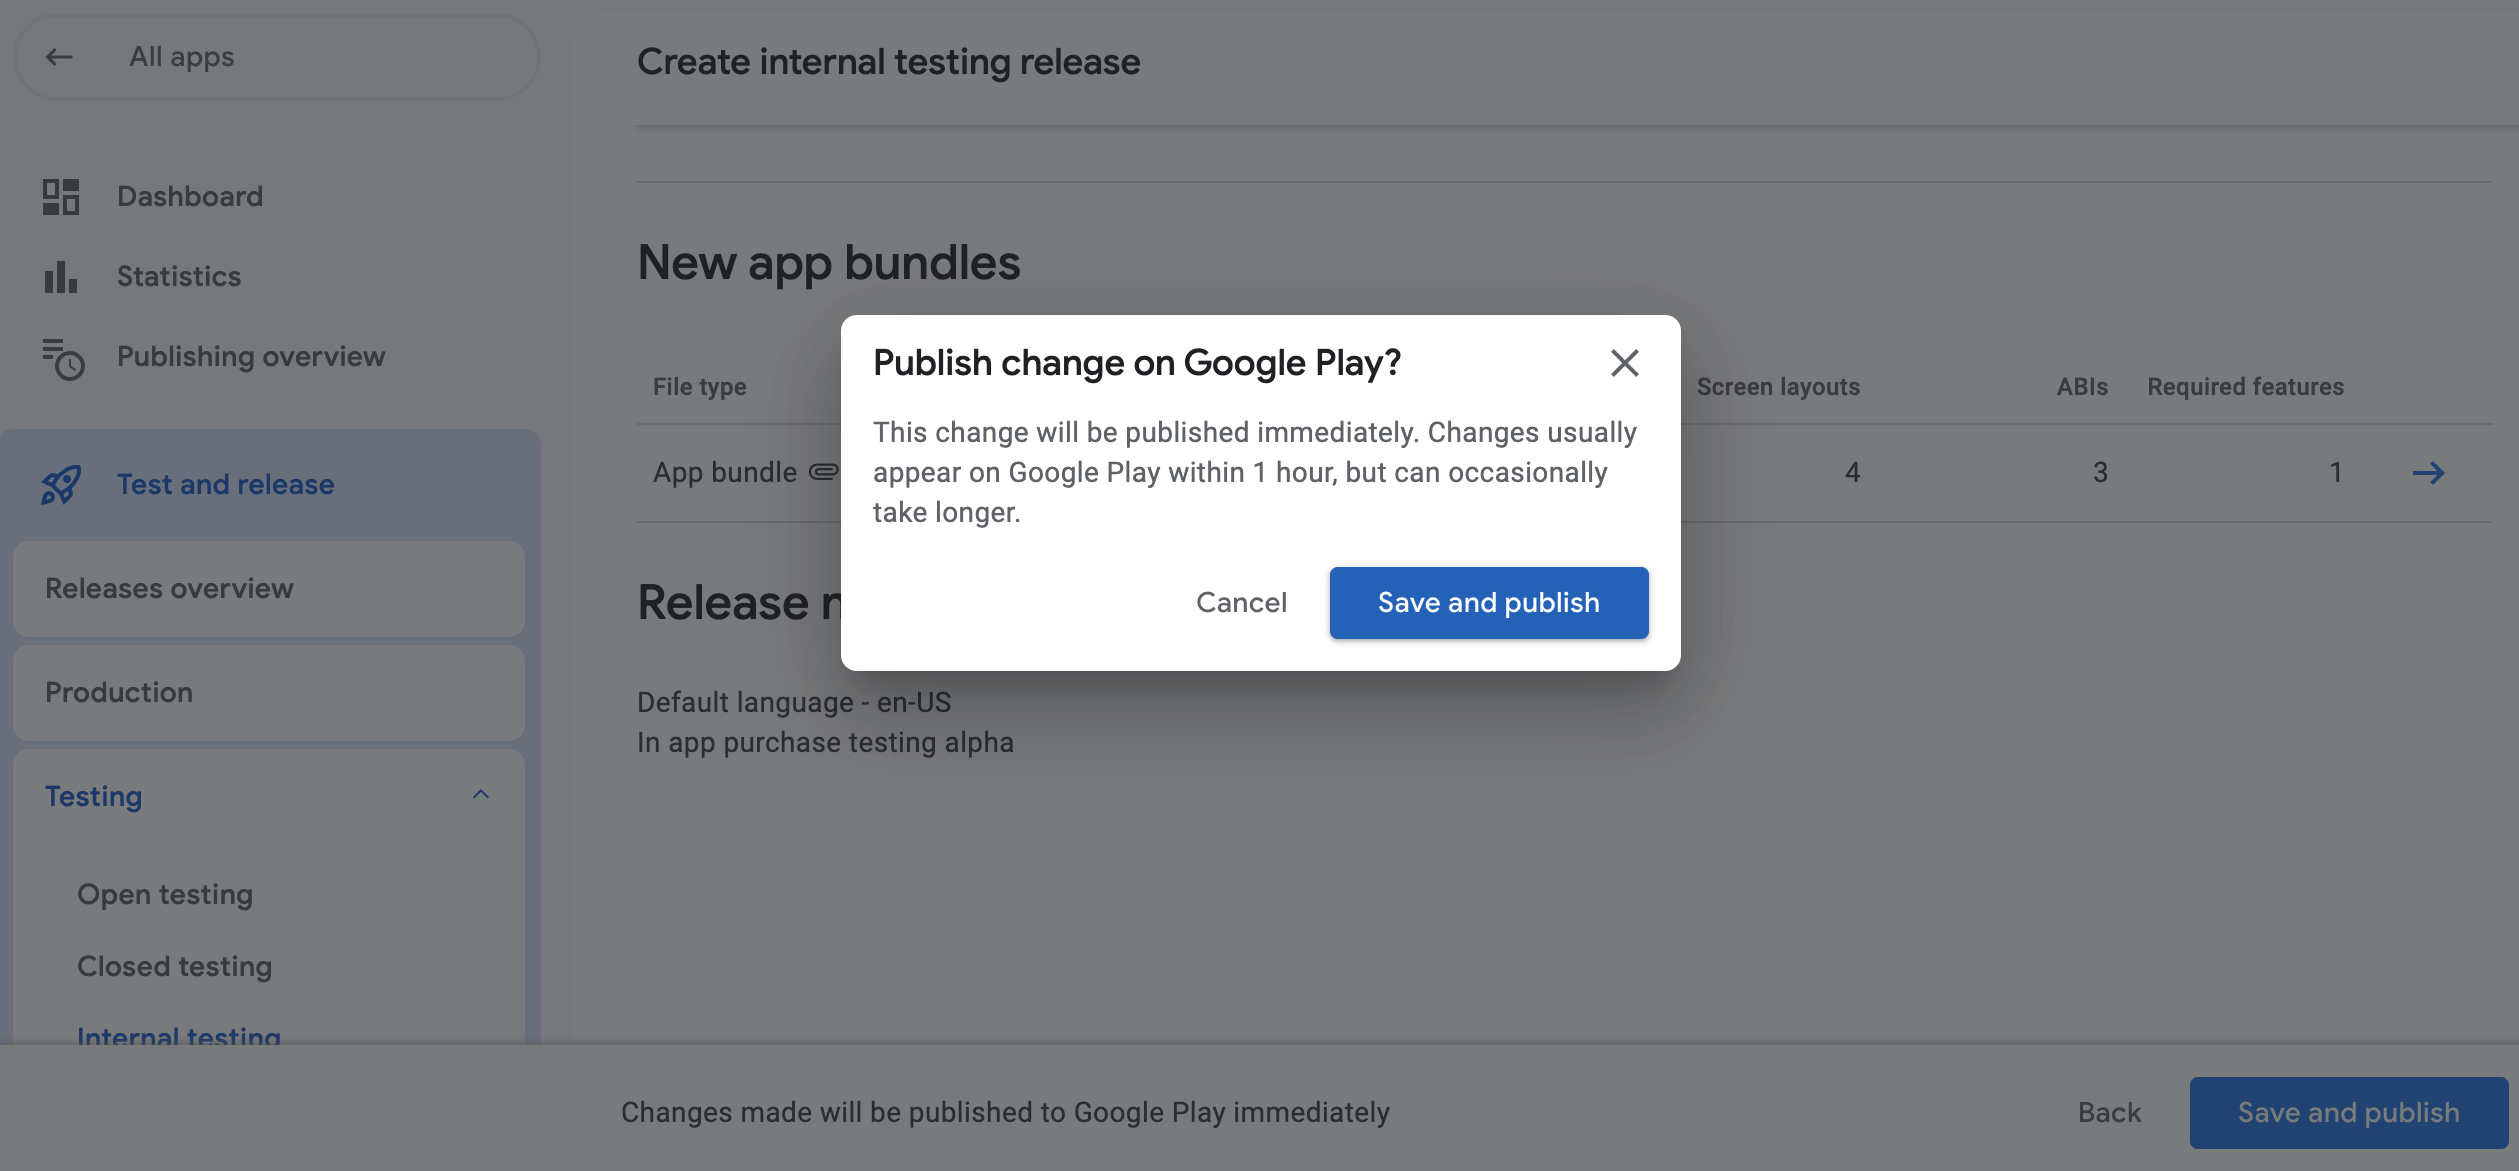
- Next click on save and publish.
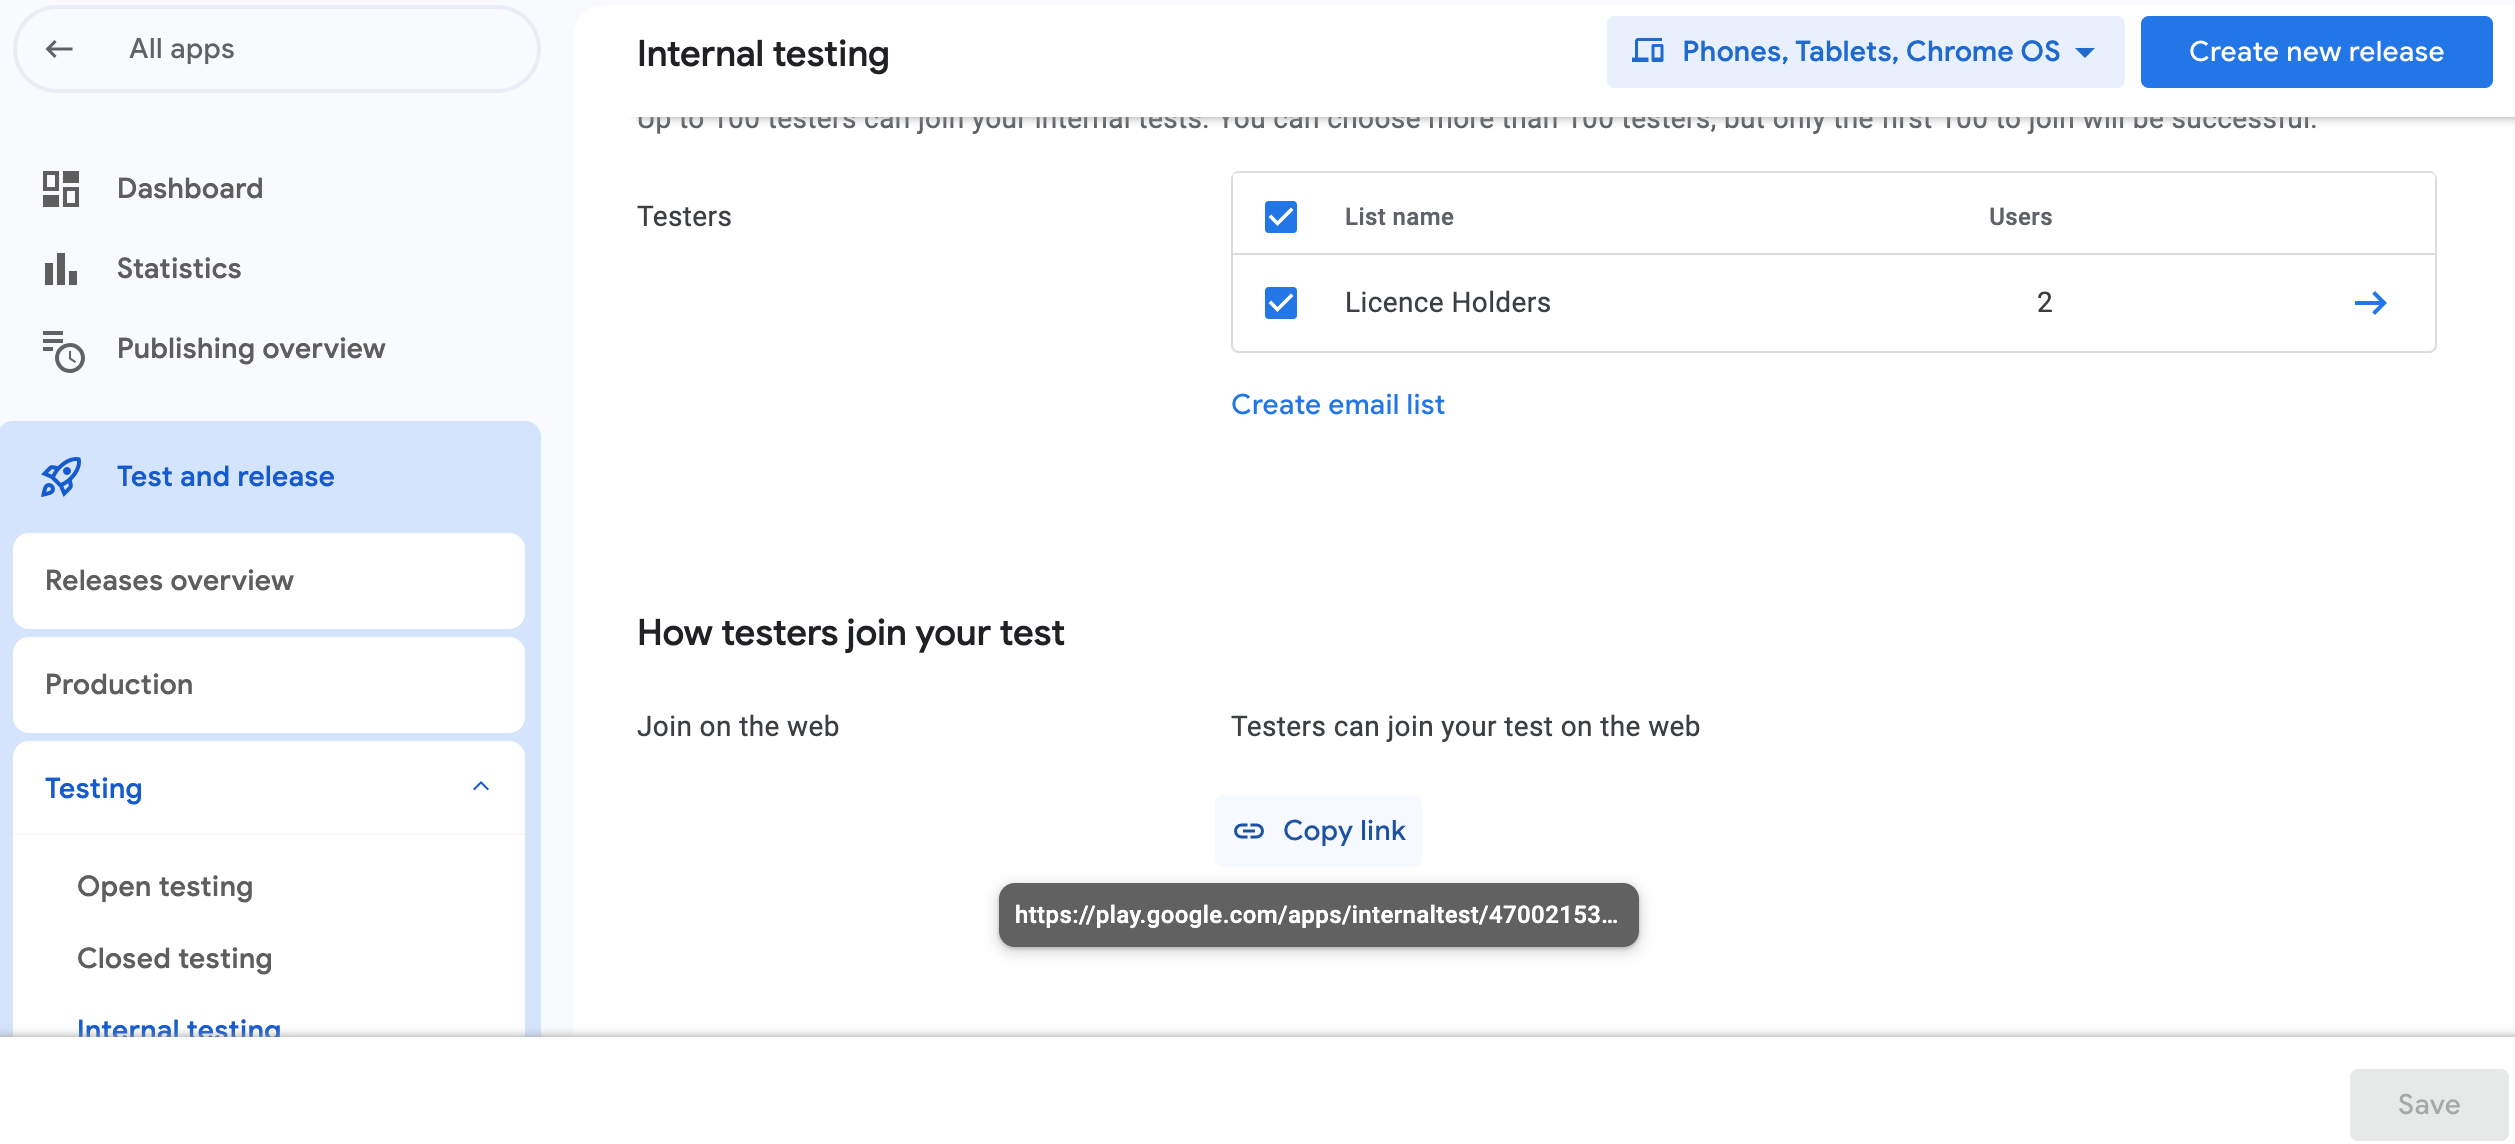
- In Testers section select the list of emails added earlier for licence testers and save the chnages.
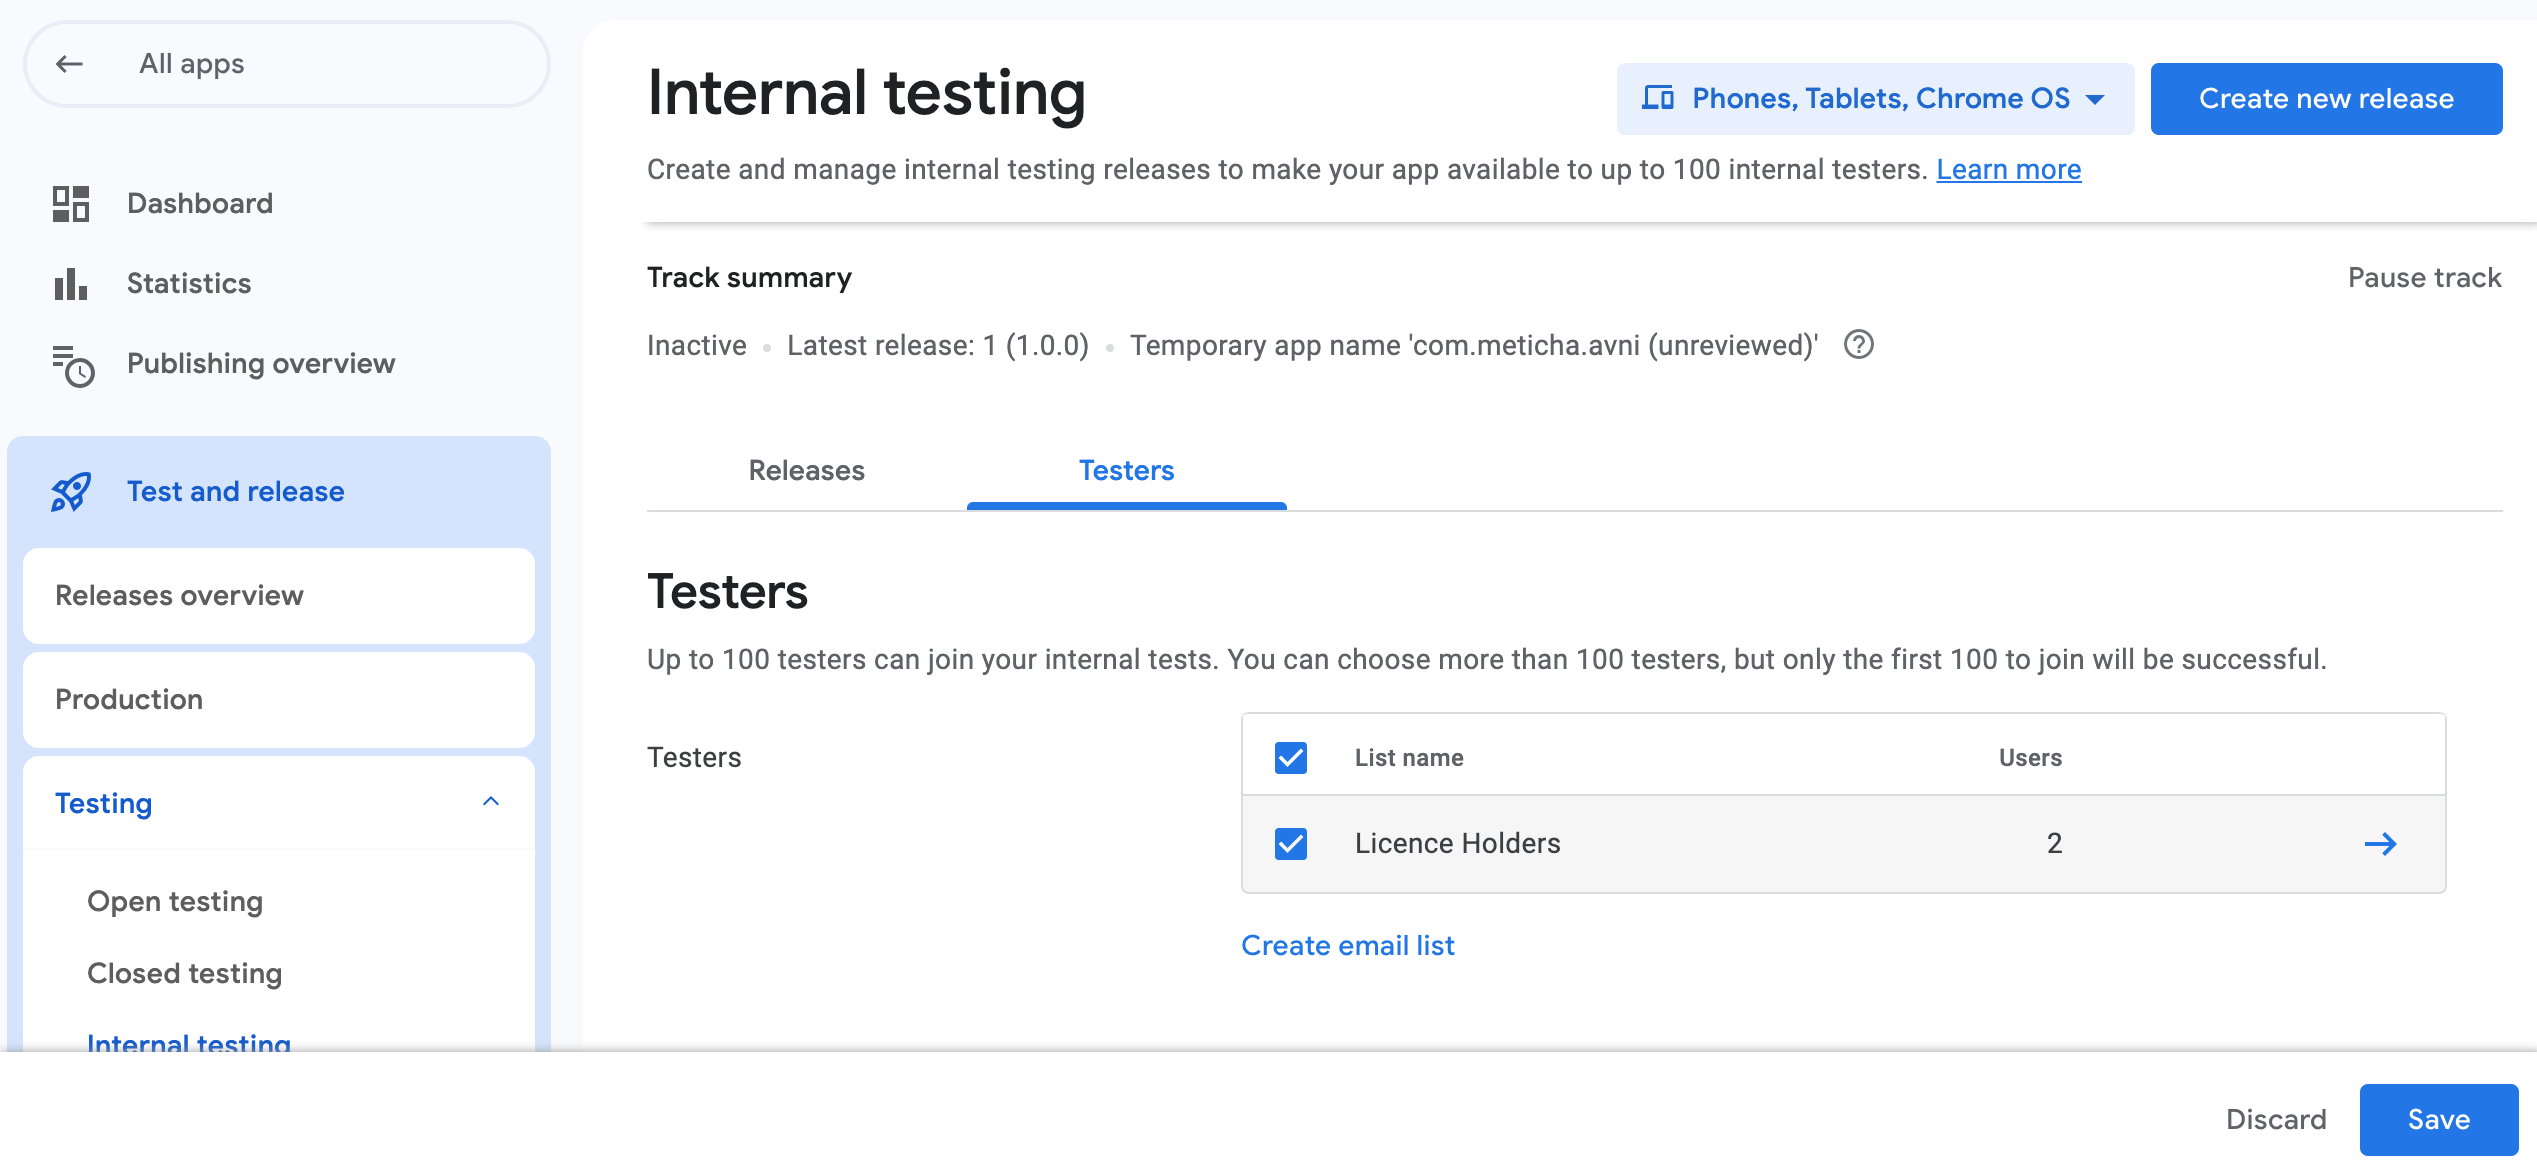
- You can also copy the link and share to testers.
Finally now we can add products for In-App purchase.